Follow Me On Social Media!

Vintage Ermine Frosting: Decadent Creaminess Made Easy
Introduction to Vintage Ermine Frosting
When you think of vintage ermine frosting, imagine a creamy, fluffy texture that melts in your mouth, reminiscent of simpler times when desserts were crafted with love and care. This delightful frosting has been a staple in classic baking for generations, bringing a sense of nostalgia to modern kitchen counters. It’s more than just a sweet topping; it’s a rich tradition, a whisper of culinary history that adds depth to cakes and pastries, making them truly irresistible.
What is Vintage Ermine Frosting and Why is it a Classic Confection?
Vintage ermine frosting, often known as flour buttercream, combines simple ingredients in a unique way. The base consists of flour, sugar, milk, butter, and vanilla, creating a creamy consistency that’s both decadent and light. Unlike many modern frostings that incorporate powdered sugar, this frosting is cooked on the stovetop, allowing the flour to thicken and create a smooth paste. This traditional method gives ermine frosting its characteristic richness and subtle sweetness, setting it apart from other frostings.
One reason vintage ermine frosting remains a classic is its versatile nature. Whether you’re frosting a luscious chocolate cake or a simple vanilla sponge, it complements various flavors beautifully. This harmony makes it a go-to choice for birthdays, weddings, or any occasion that calls for celebration. Moreover, the frosting’s creamy texture holds up well, making it easier to work with for intricate decorative piping.
But there’s something else that makes this frosting special: its connection to nostalgia. For many, it evokes memories of baking with grandparents or gatherings filled with laughter and sweets. Today, as young bakers seek to create their own fond memories in the kitchen, this classic recipe offers an opportunity to pass down traditions while enjoying the pleasures of baking.
As you dive into making vintage ermine frosting, remember that it’s not just about following a recipe; it’s about embracing the art of baking and cherishing the love and history that each swirl of frosting conveys.
Key Ingredients for Vintage Ermine Frosting
Creating vintage ermine frosting is like stepping into a delightful culinary time machine, bringing an old-world charm to your modern dessert table. The taste and texture of this frosting make it a classic favorite for any cake lover.
-
Milk: Start with whole milk for a richer flavor. It helps create that smooth, creamy consistency that makes this frosting so luxurious. For a twist, try using buttermilk for a slight tang.
-
Flour: Use all-purpose flour to make the roux, which is the base of this frosting. It thickens as you cook it and lends that unique, velvety texture that’s a hallmark of ermine frosting.
-
Butter: Unsalted butter is ideal here. It adds richness and contributes to the overall smoothness, making your frosting easily spreadable and perfect for layering.
-
Granulated Sugar: This sweet guardian of your frosting balances the texture and improves the sweetness factor. Be sure to cream it well with the butter for best results.
-
Vanilla Extract: A splash of pure vanilla extract elevates the flavor, making every bite pure bliss. For a fun twist, almond extract can be a delightful substitute.
Each of these ingredients adds its own unique touch, ensuring that your vintage ermine frosting stands out as a nostalgic yet delicious treat. Happy baking!
Why You’ll Love This Recipe
Indulging in vintage ermine frosting can feel like unearthing a treasured family secret, connecting us to the simplicity and joy of homemade desserts. This delightful frosting not only elevates your baked goods, but it also carries a sense of nostalgia that invites you to revisit cherished memories with each luscious bite.
A Perfectly Fluffy Texture
One of the standout features of vintage ermine frosting is its incredibly light and fluffy texture. Unlike traditional buttercream, this frosting offers a unique creaminess that melts in your mouth, making it the ideal partner for cakes and cupcakes alike.
Versatile for Any Occasion
Whether you’re celebrating a birthday, hosting a gathering, or simply treating yourself, this frosting is exceptionally versatile. Its subtle sweetness complements a variety of cake flavors—from chocolate to vanilla, and even spice cakes—ensuring it’s suitable for any palate.
Easy to Make
If you appreciate straightforward, no-fuss recipes, you’ll love how easy it is to whip up vintage ermine frosting. With just a handful of ingredients, it’s a quick and satisfying project that can be accomplished in no time. Plus, it offers an opportunity to impress your friends and family with a delightful homemade touch.
A Taste of Nostalgia
Perhaps the most charming aspect of this recipe is its connection to the past. Many of us have memories of our grandmothers or mothers making this frosting, turning ordinary cakes into extraordinary treats. Enjoying a slice of cake adorned with this frosting might just transport you back to those comforting days, evoking a delightful sense of nostalgia.
By choosing this recipe, you’re not just making a frosting; you’re creating moments and memories that will last a lifetime.
Variations on Vintage Ermine Frosting
Vintage ermine frosting has a nostalgic charm that can easily be adapted to excite your taste buds. Whether you’re looking to elevate classic flavors or introduce unexpected twists, here are some delightful variations.
Chocolate Ermine Frosting
For those who crave a rich, chocolatey experience, simply add cocoa powder to your vintage ermine frosting. Start with ½ cup of unsweetened cocoa powder and mix it in while cooking your flour and milk base. This deepens the flavor without sacrificing that creamy texture, creating a luscious chocolate frosting that pairs beautifully with red velvet or chocolate cakes.
Citrus-Infused Frosting
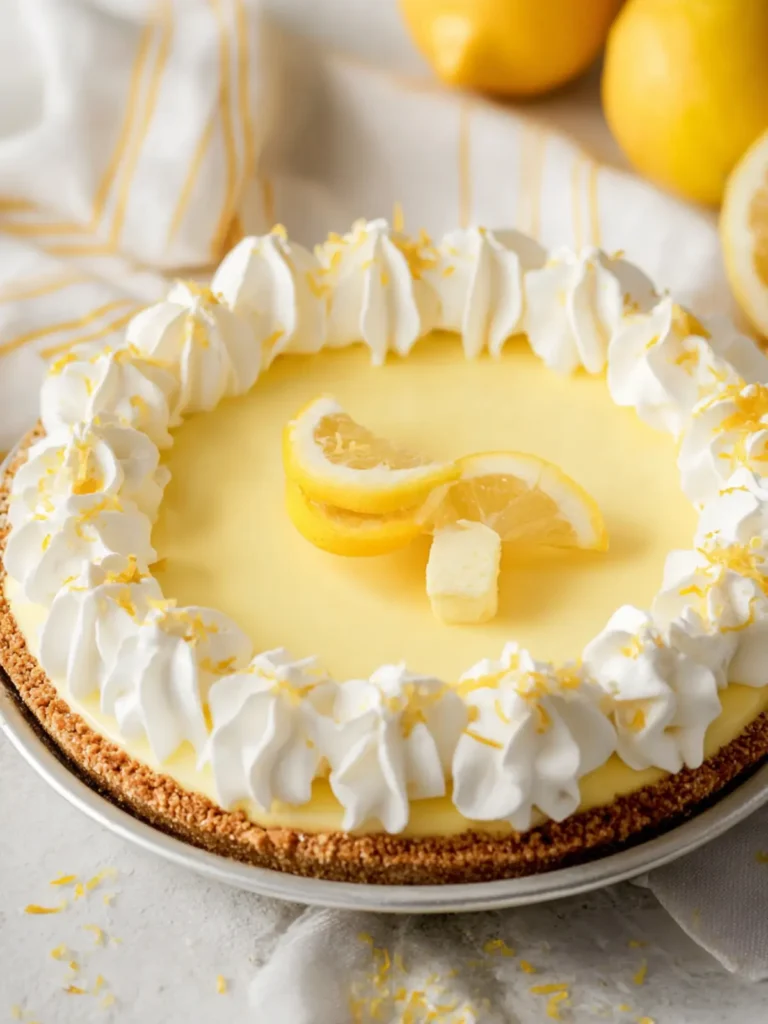
A hint of citrus can brighten up the creamy richness of ermine frosting. Add the zest and juice of a lemon or orange to your frosting once it has cooled. This variation offers a refreshing balance that complements vanilla cakes or even a lemon layer cake remarkably well.
Nut Butter Twist
For an unexpected flavorful twist, incorporate nut butter such as almond or peanut butter. Start with ½ cup of your chosen nut butter and blend it into your frosting after the flour and milk have cooled. This creates a uniquely nutty flavor profile that’s both satisfying and delicious, making it an enticing topping for chocolate or banana cakes.
Spiced Ermine Frosting
Adding spices is a fantastic way to enhance the flavor of vintage ermine frosting. Whisk in cinnamon, nutmeg, or even cardamom for a warm, aromatic frosting that pairs beautifully with carrot or pumpkin cakes. Start with a teaspoon of your favorite spice and adjust to taste!
These variations not only keep the classic ermine frosting alive but also allow you to personalize your dessert experience. Happy frosting!
Cooking Tips and Notes for Vintage Ermine Frosting
Crafting the perfect vintage ermine frosting is a delightful experience that can elevate your baked goods to a new level. This classic frosting is all about balance and technique, and a few simple tips can make a world of difference.
Understanding the Basics
-
Milk Choice: For the best flavor, use whole milk in your vintage ermine frosting. It creates a rich and creamy base that contributes to the smooth texture. If you’re in a pinch, 2% milk can work but may yield a slight difference in richness.
-
Butter: Always use unsalted butter for frosting. This gives you complete control over the saltiness of your frosting. Allow the butter to soften at room temperature beforehand for easier mixing, which results in a smoother consistency.
Mastering the Technique
-
Cooking the Flour Mixture: The key to achieving that signature ermine flavor lies in cooking the flour and milk mixture. Make sure to whisk continuously to prevent lumps—consider using a whisk instead of a spoon for better texture.
-
Cooling Time: Once you’ve cooked the mixture, let it cool completely before adding the butter and sugar. This cooling step prevents the butter from melting and ensures a whipped, fluffy finish.
Final Touches
-
Whipping: Spend time whipping the butter and sugar until fluffy. Don’t rush this step; the air incorporated during this process is what creates that light texture.
-
Flavor Additions: Feel free to experiment with flavorings. Vanilla extract is classic, but almond extract can add a delightful twist.
By keeping these tips in mind, you’ll find that your vintage ermine frosting not only tastes wonderful but also has the perfect texture for spreading or piping. Happy baking!
Serving Suggestions for Vintage Ermine Frosting
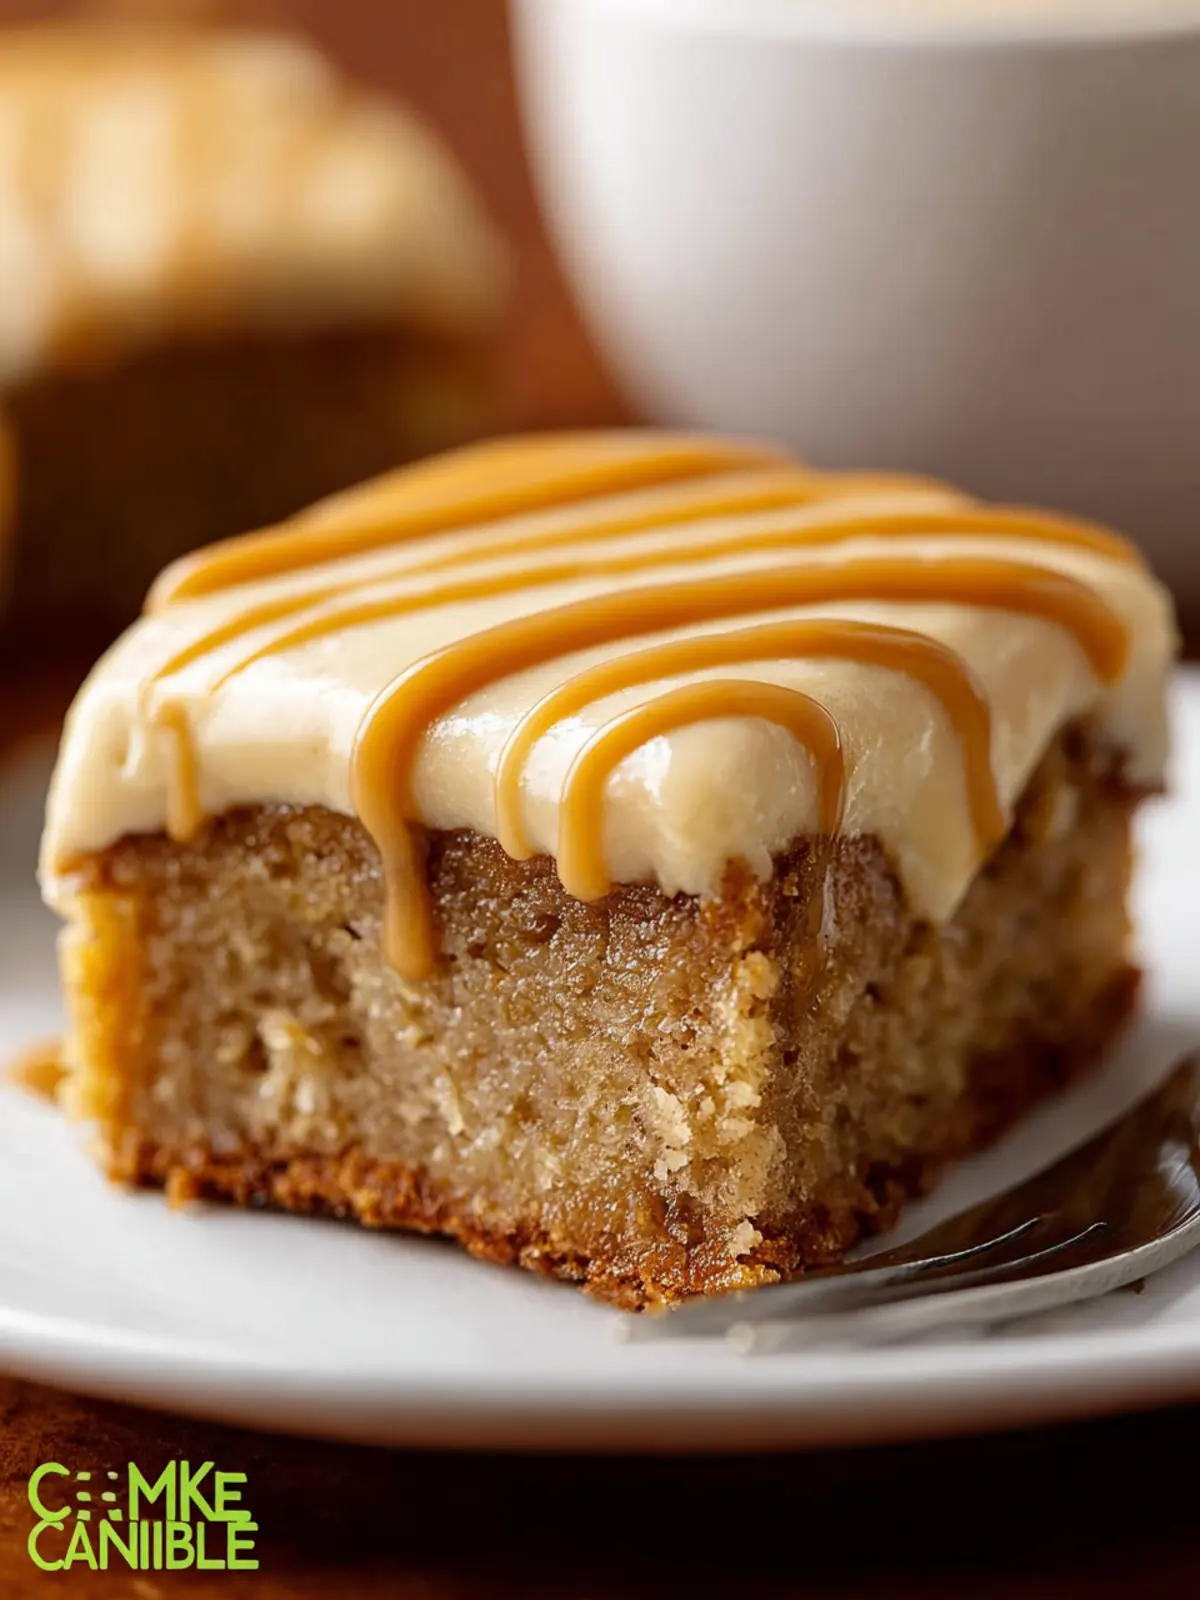
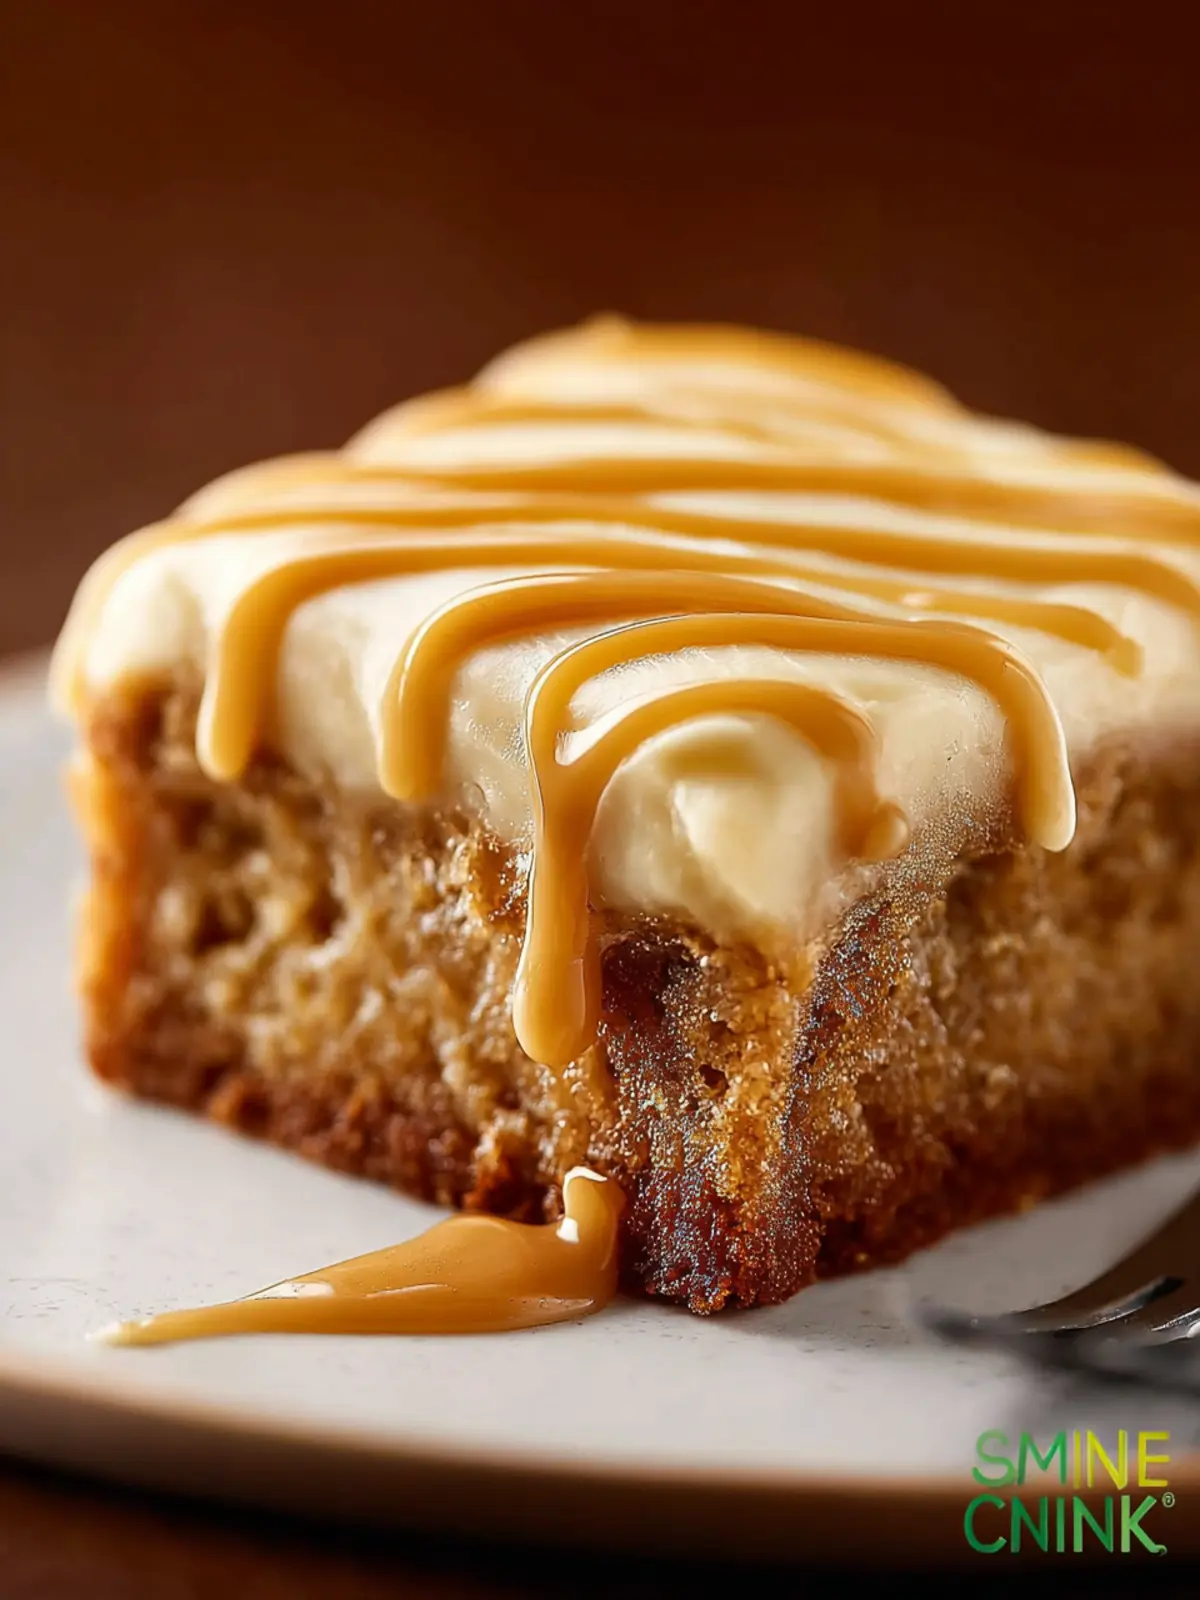
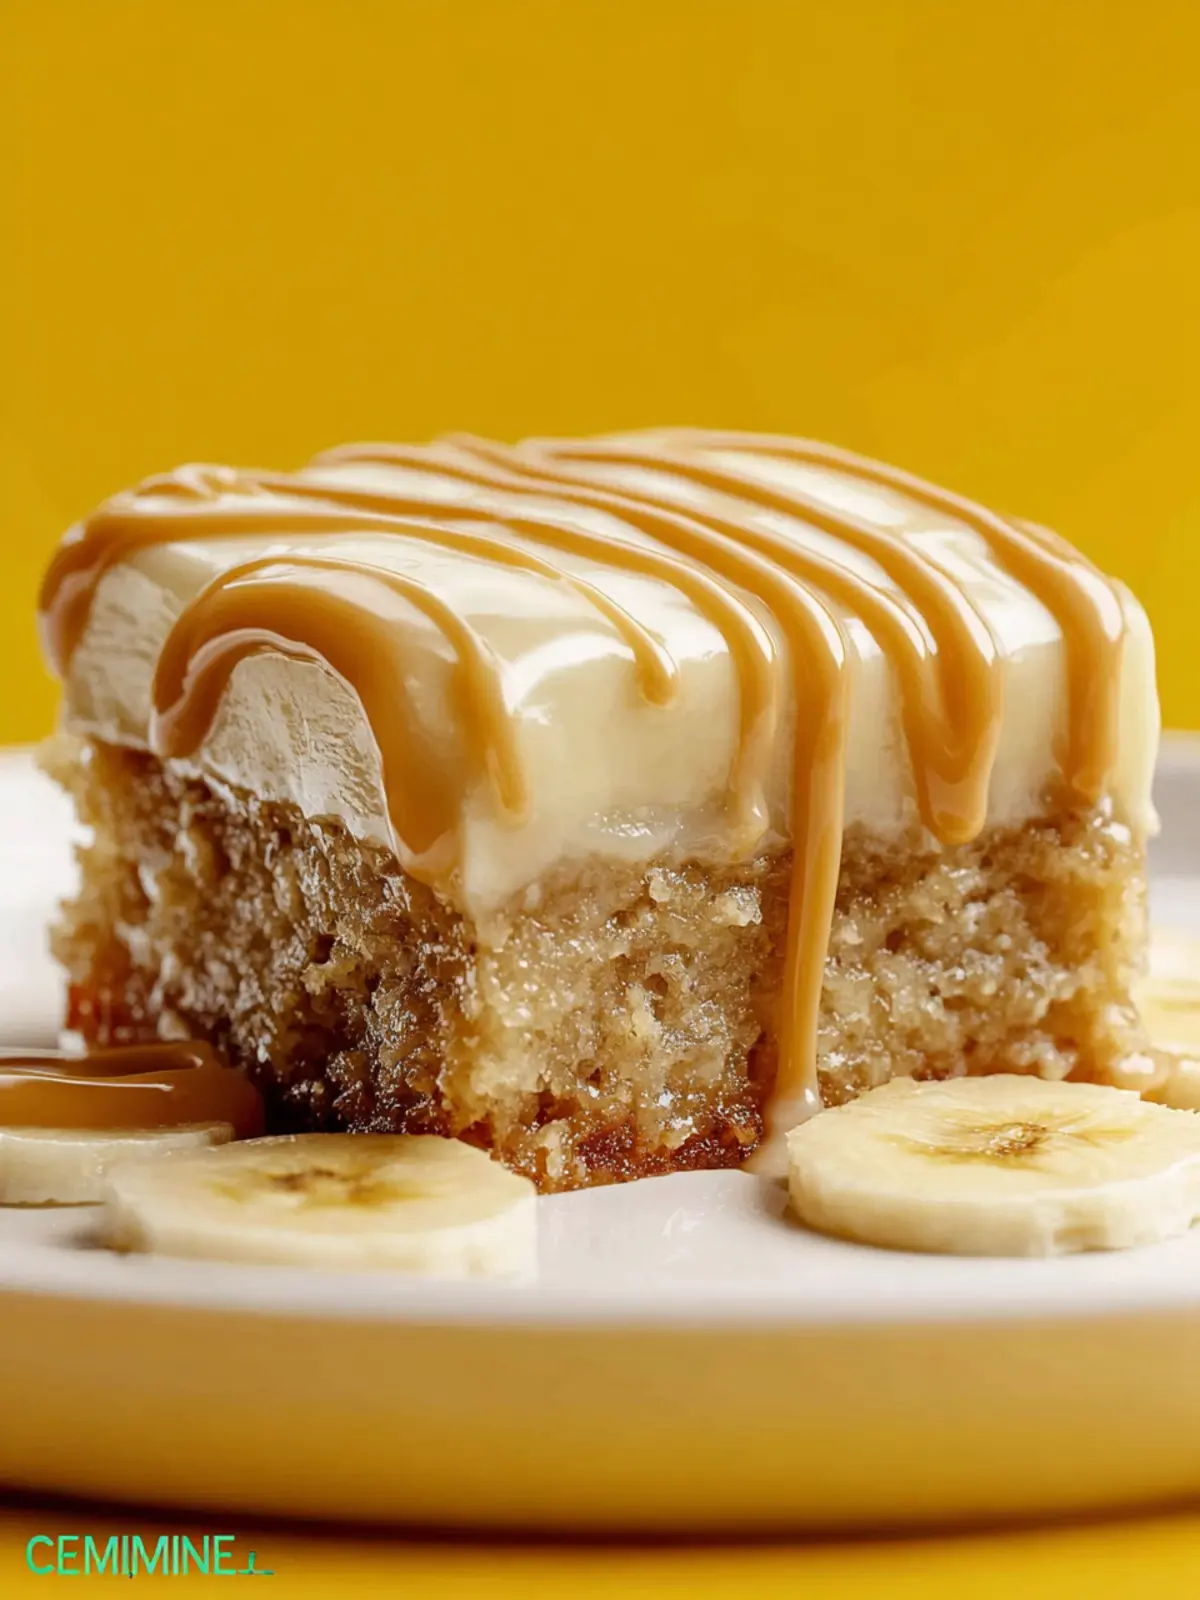
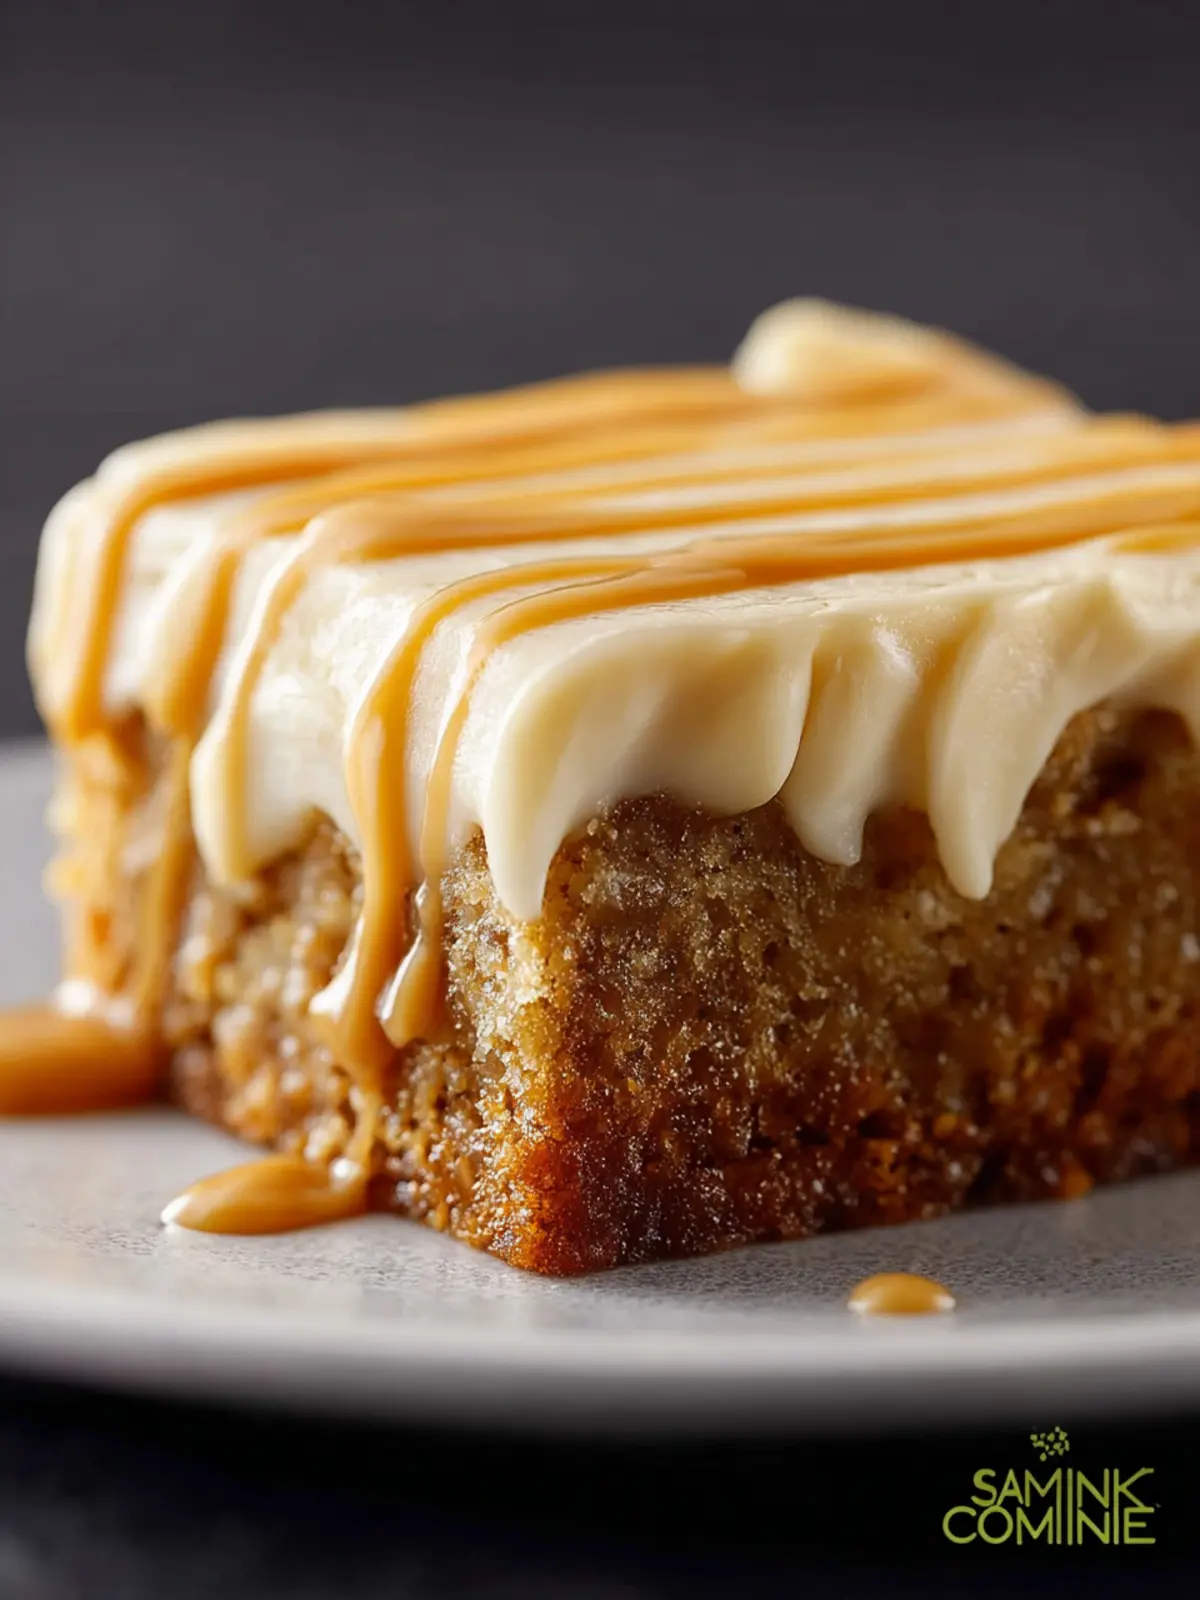
When you whip up a batch of vintage ermine frosting, you’re not just making icing; you’re adding a nostalgic touch to your baking. This extraordinarily creamy frosting, with its rich and fluffy texture, is not only perfect for cakes but can elevate a range of desserts to a new level of elegance.
Pairing with Classic Cakes
- Chocolate Cake: The subtle sweetness of vintage ermine frosting pairs perfectly with the deep flavors of a chocolate cake, creating a harmonious balance.
- Red Velvet Cake: The frosting’s lightness complements the dense, velvety texture of red velvet, making it an ideal choice for this classic dessert.
Perfect for Cupcakes
Imagine a swirl of vintage ermine frosting atop your favorite cupcakes. Whether they’re vanilla, chocolate, or even carrot, this frosting adds a delicate touch that will impress at any event.
Spread it on Brownies
Feeling adventurous? Spread a layer of vintage ermine frosting over rich, fudgy brownies for an enhanced dessert experience. The creamy topping softens the richness of the brownies, making every bite an indulgent treat.
These serving suggestions are just the beginning; let your creativity flow, and soon you’ll find so many delightful ways to enjoy this charming frosting.
Time Breakdown for Vintage Ermine Frosting
Creating the perfect vintage ermine frosting is an art that beautifully melds time and technique. Here’s how you can break it down:
Preparation Time
You’ll need about 10 to 15 minutes to gather your ingredients and prepare your workspace. Ensure everything is at room temperature for that silky-smooth finish!
Cooking Time
The cooking process takes about 15 to 20 minutes, during which you’ll be making the flour and milk mixture that forms the base of your frosting.
Total Time
In total, from prep to finish, expect to spend around 30 to 40 minutes crafting this delightful vintage ermine frosting. It’s a truly rewarding experience that’ll elevate any dessert!
Nutritional Facts for Vintage Ermine Frosting
Creating the perfect vintage ermine frosting is not just about taste; understanding its nutritional profile enhances your baking experience. This rich and creamy frosting has a nostalgic quality, often evoking memories of family gatherings and special celebrations.
Calories
A typical serving of vintage ermine frosting contains approximately 150 calories. This delightful treat adds a sweet touch without overshadowing the cake or dessert it adorns.
Sugar Content
With about 25 grams of sugar per serving, this frosting is undoubtedly sweet. Its sugar content contributes significantly to its creamy texture and delightful flavor, making it a perfect match for a variety of cakes.
Fat Content
The vintage ermine frosting boasts around 6 grams of fat per serving, primarily from the butter used in the recipe. This creamy base not only adds richness but also helps achieve that smooth, spreadable consistency that makes this frosting a favorite among bakers.
Understanding these nutritional facts can help you make informed choices about how much frosting you’d like to indulge in. After all, a small amount of vintage ermine frosting can elevate your dessert experience wonderfully!
FAQ about Vintage Ermine Frosting
Vintage Ermine Frosting reigns as a classic favorite, with its creamy texture and historical charm. Whether you’re planning a special occasion or simply indulging in a sweet treat, you may have some questions. Let’s dive into the most common inquiries!
Can I use this frosting for any cake?
Absolutely! Vintage Ermine Frosting is versatile enough to complement a variety of cakes. It pairs beautifully with:
- Chocolate cakes: The lightness of the frosting balances the rich cocoa flavor.
- Vanilla and yellow cakes: The subtle sweetness enhances the cake’s natural flavors.
- Carrot or spice cakes: The creamy texture adds a delightful touch to the warm spices.
This frosting’s adaptability makes it a delightful option for nearly any cake you wish to create!
How do you store leftover frosting?
If you find yourself with extra Ermine Frosting—lucky you! To keep it fresh:
- Refrigeration: Store it in an airtight container in the fridge for up to one week.
- Freezing: For longer storage, freeze the frosting. Place it in an airtight container, and it can last up to three months. Just be sure to let it thaw in the refrigerator before using it again.
Can I add flavors to the Vintage Ermine Frosting?
Certainly! One of the beauties of Ermine Frosting is its ability to be customized. Here are some popular flavor additions:
- Vanilla Extract: A classic choice to enhance the overall taste.
- Cocoa Powder: For a rich chocolate variation, whisk in cocoa powder to create chocolate Ermine Frosting.
- Citrus Zest: A bit of lemon or orange zest can brighten the flavor profile.
Feel free to experiment and create your own delicious versions!
Conclusion on Vintage Ermine Frosting
Crafting the perfect vintage ermine frosting transforms any cake into a delightful centerpiece worthy of celebration. Its creamy, rich texture paired with a subtle sweetness makes it an absolute hit. Whether you’re whipping it up for a family gathering or simply treating yourself, this frosting bridges nostalgia and modernity beautifully.
With its blend of butter, milk, and sugar, this frosting stays true to its vintage roots while offering just the right amount of versatility; you can easily pair it with chocolate, vanilla, or even fruity cakes. So why not roll up your sleeves and give this timeless frosting a try? You’ll be glad you did!
Print
Milk and Butter Cream
- Total Time: 30 minutes
- Yield: 2 cups 1x
- Diet: Vegetarian
Description
A rich and creamy dessert made with milk, butter, and sugar.
Ingredients
Scale
- 1 cup whole milk
- 5 tablespoons all-purpose flour
- 1 cup granulated sugar
- 1 cup unsalted butter, room temperature
- 1 1/2 teaspoons vanilla extract
- 1/8 teaspoon salt
Instructions
- In a saucepan over medium heat, whisk flour and milk until smooth and thickened like pudding (about 7–10 minutes).
- Remove from heat, transfer to a bowl, and cover with plastic wrap directly on the surface to avoid skin forming. Let cool completely.
- In a stand mixer, beat butter and sugar on high until very light and fluffy, about 5–7 minutes.
- Add the cooled flour-milk mixture to the creamed butter one tablespoon at a time, beating well after each addition.
- Add vanilla extract and salt, then beat until light, fluffy, and silky smooth.
- If needed, chill for 10–15 minutes to firm up before piping or spreading.
Notes
- This cream can be used for filling cakes or as a topping for desserts.
- Ensure all ingredients are at room temperature for best results.
- Prep Time: 20 minutes
- Cook Time: 10 minutes
- Category: Dessert
- Method: Mixing
- Cuisine: American
Nutrition
- Serving Size: 1/4 cup
- Calories: 200
- Sugar: 15g
- Sodium: 50mg
- Fat: 15g
- Saturated Fat: 10g
- Unsaturated Fat: 5g
- Trans Fat: 0g
- Carbohydrates: 25g
- Fiber: 0g
- Protein: 2g
- Cholesterol: 30mg