Follow Me On Social Media!

Cereal Bars Recipe: Irresistibly Easy & Healthy Treats!
Introduction to Cereal Bars Recipe – Healthy & Easy!
Creating your own cereal bars is a delightful way to enjoy nutritious snacking while tailoring flavors to your personal taste. Imagine coming home after a long day — instead of reaching for pre-packaged snacks loaded with hidden sugars and artificial ingredients, you grab a wholesome, homemade cereal bar bursting with natural ingredients. Not only do these bars satisfy your cravings, but they also provide an energy boost to power through your busy schedule.
Cooking at home allows you to experiment with flavors and textural combinations that store-bought versions can’t match. Think of all the delicious possibilities! You have the freedom to choose your favorite nuts, dried fruits, and sweeteners. Whether you prefer a rich chocolate flavor or a fruity mix, this cereal bars recipe offers a solid foundation you can customize endlessly.
The joy of homemade snacks
Crafting your own snacks means knowing exactly what goes into them — a big plus when it comes to maintaining a healthy lifestyle. Have you ever taken a moment to check the ingredients on the back of a commercial snack bar? It often reads like a chemistry experiment rather than a wholesome treat. By making your own cereal bars, you can incorporate ingredients that are both nutritious and satisfying.
Here are just a few reasons why whipping up these cereal bars at home is a joy:
- Customizable: Add your favorite nuts, seeds, or dried fruits to make each batch your own.
- Nutrient-Dense: Choose wholesome ingredients like oats, honey, and nut butter to pack in nutrients.
- Easy to Make: With simple instructions, you can have a batch ready in no time, even on a busy weeknight.
- Great for On-the-Go: These bars are perfect for a quick breakfast or an energy boost during your day.
Embrace the art of homemade snacking with this easy and healthy cereal bars recipe — it’s a small change that can lead to big rewards in your daily energy and wellness.
Key Ingredients for Cereal Bars Recipe – Healthy & Easy!
Peanut Butter
I love using creamy peanut butter for its rich flavor and smooth texture. It’s not just a binding agent; it brings a delightful nuttiness that keeps me coming back for more. Plus, the healthy fats in peanut butter provide lasting energy throughout the day!
Pure Maple Syrup
When it comes to sweetness, pure maple syrup is my go-to choice. This natural sweetener perfectly complements the nutty flavor of the bars, making them irresistibly delicious while ensuring they feel wholesome too. The hint of maple truly elevates the taste profile.
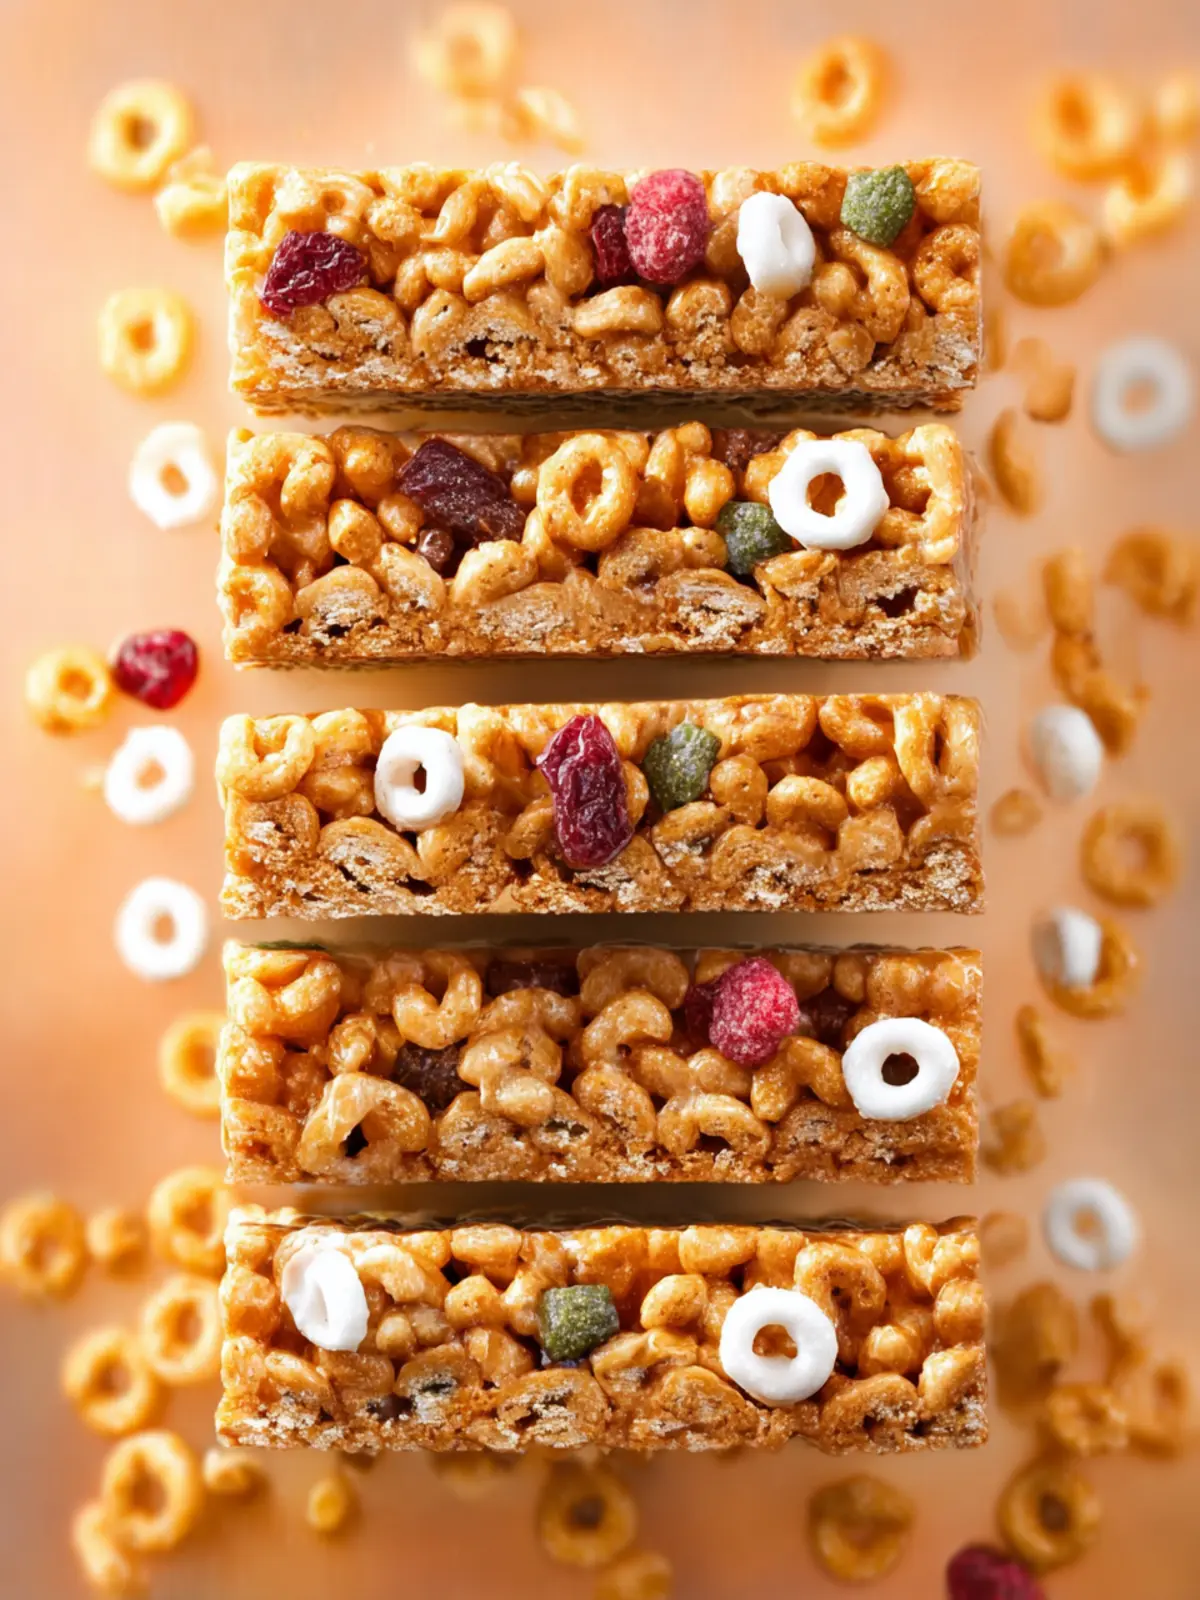
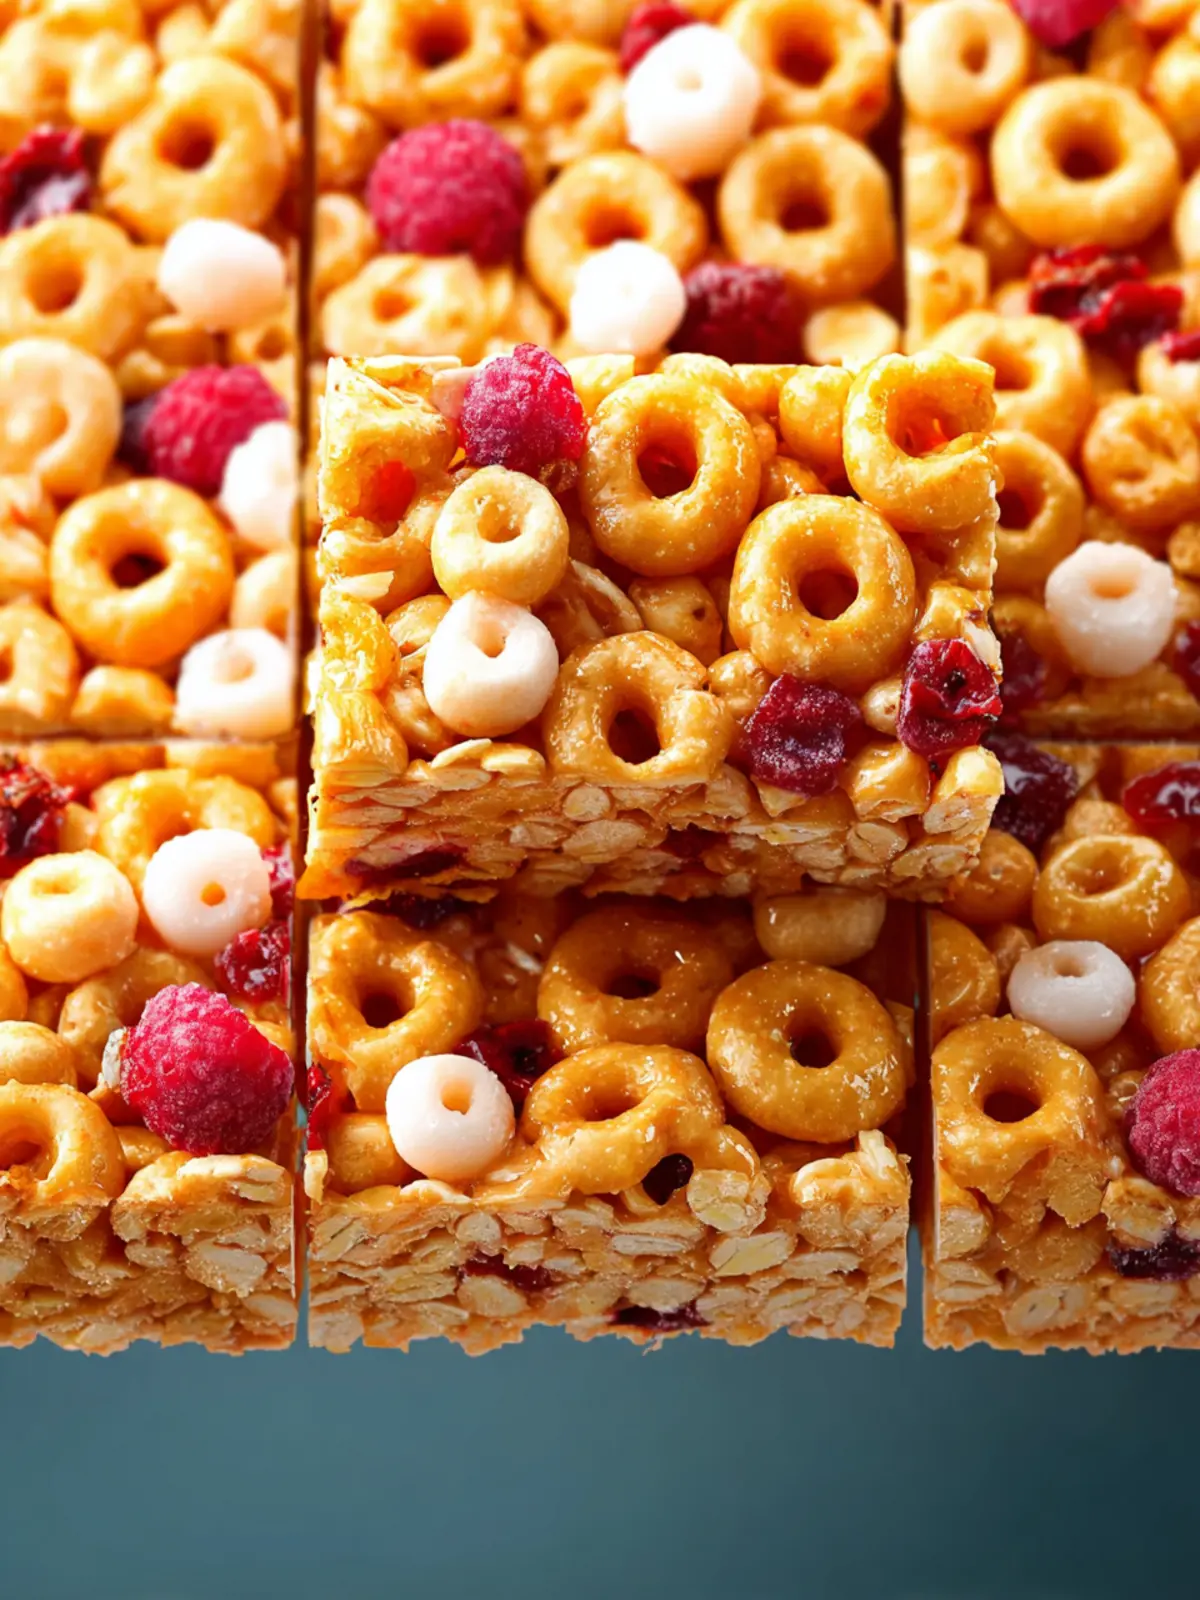
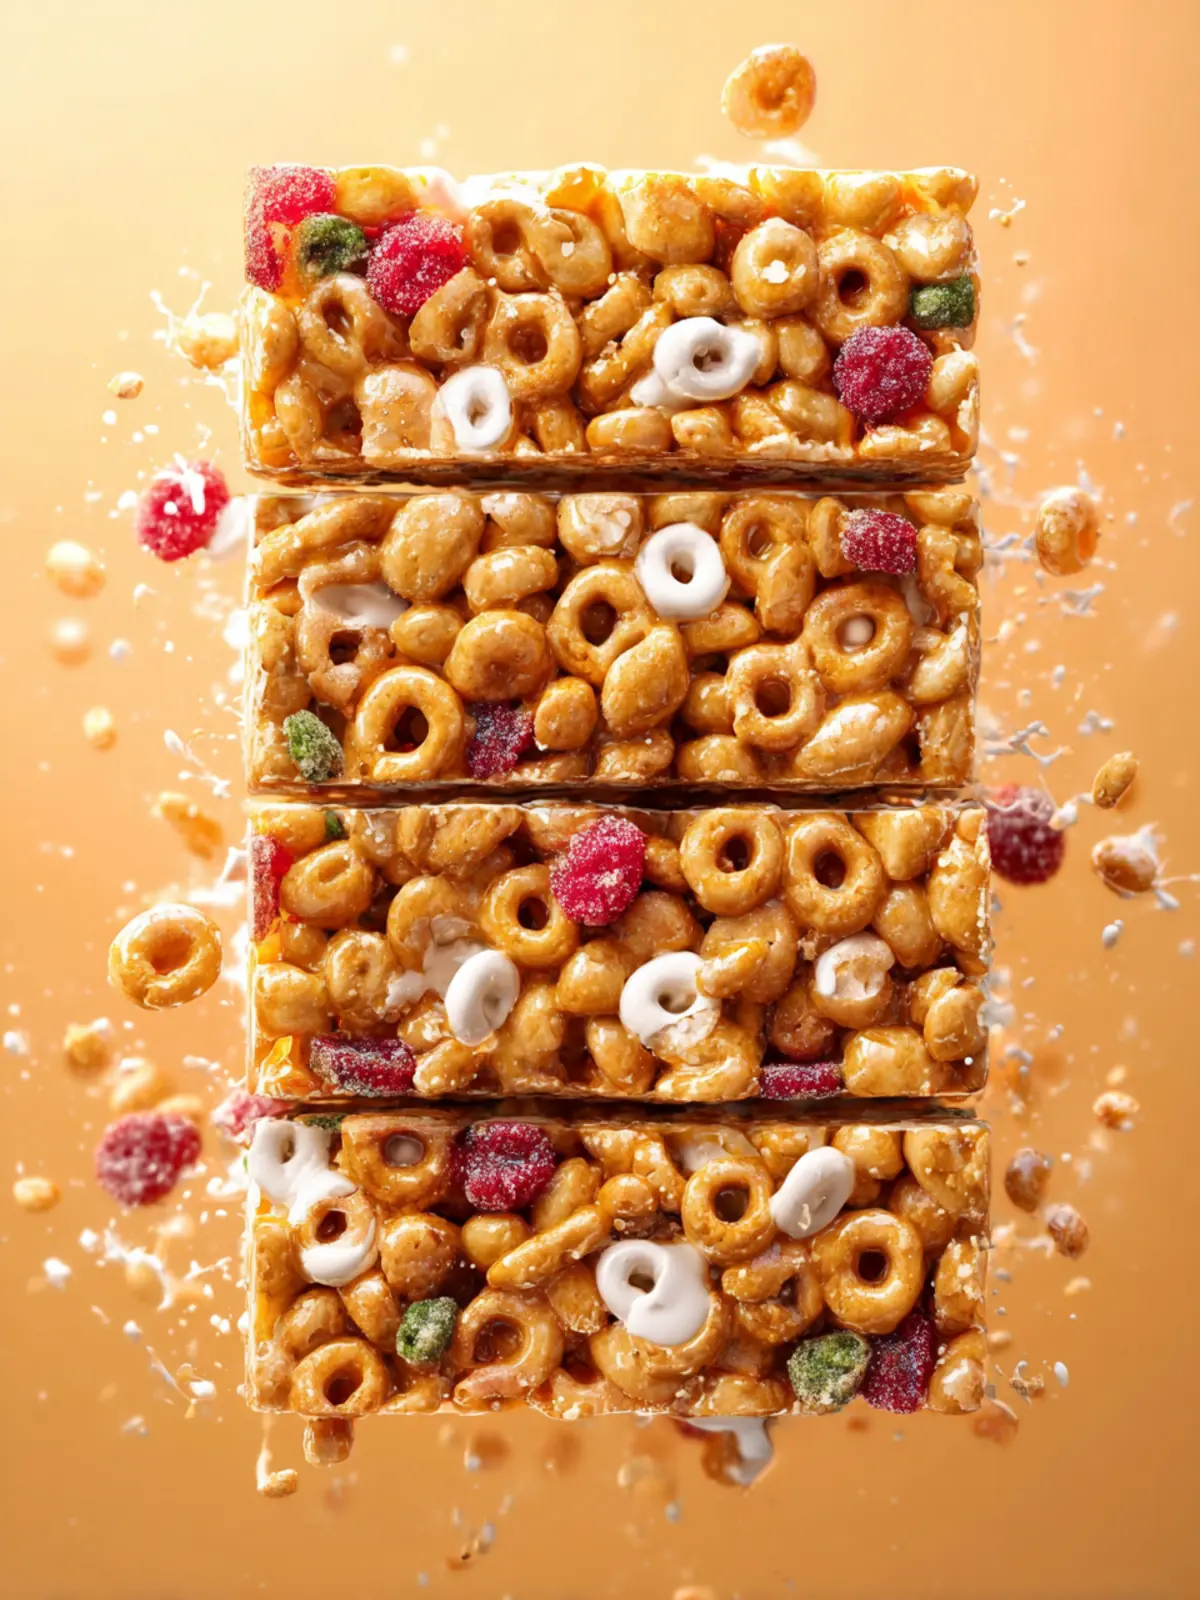
Cereal
For this cereal bars recipe, I recommend using Cheerios or your favorite crunchy cereal. The key is to select a brand that retains its crunch even after mixing with the other ingredients. This provides a satisfying crunch in every bite!
Optional Toppings
Adding fun toppings like chocolate chips or freeze-dried fruit gives these bars a delightful twist! It’s a simple way to customize each batch according to your personal taste, making each snack both exciting and unique.
Why You’ll Love This Cereal Bars Recipe
Healthy snacking made easy
Imagine a busy afternoon where you’re racing from one task to another, and a growling stomach sends you into a frenzy. The ideal solution? This cereal bars recipe brings you a wholesome snack that’s not only effortless to prepare but deliciously satisfying. Packed with nutrients, these bars provide the perfect balance of energy to keep you going.
- Nutrient-Packed: With ingredients like oats and nuts, you’re fueling your body with essential vitamins and minerals. Unlike processed snacks, each bite is a boost of goodness.
- Customizable Flavors: One of the joys of making your own cereal bars is that you can tailor them to suit your tastes or dietary preferences. Whether you prefer chocolate chips, dried fruit, or a hint of coconut, the sky’s the limit!
- Grab-and-Go Convenience: These bars can be prepped in large batches, making them easy to store and perfect for those hectic mornings when you’re dashing out the door.
- Cost-Effective: Compared to store-bought alternatives, making your own is not just healthier but kinder to your wallet.
Try this cereal bars recipe, and you’ll quickly find it becomes your go-to snack for all occasions.

Variations on Cereal Bars Recipe
Creating your own cereal bars recipe is a fantastic opportunity to express your culinary creativity. Once you master the basics, you can tailor them to your taste buds—and your nutritional needs.
Different cereal choices
The right cereal is pivotal in achieving the perfect texture and flavor for your bars. While classic options like Cheerios or Rice Krispies work beautifully, don’t hesitate to explore alternatives:
- Granola: Offers a chewy texture and a dose of hearty oats.
- Puffed Rice: If you love a light crunch, this grain is a great choice.
- High-fiber cereals: Brands like Bran Flakes increase fiber intake and add a unique flavor.
- Gluten-free cereals: If you need to avoid gluten, options like Gluten-Free Oats or Corn Flakes are widely available.
Experiment with a combination of these to find your ideal texture!
Unique toppings for a tailor-made flavor
The fun part of a cereal bars recipe lies in the toppings. You can be as adventurous as you’d like:
- Nuts and Seeds: Almonds, walnuts, or sunflower seeds bring crunch and nutrients.
- Dried Fruits: Consider cranberries, apricots, or raisins for a touch of sweetness.
- Chocolate Drizzle: Dark or white chocolate adds a decadent finish.
- Spices: A sprinkle of cinnamon or a hint of vanilla extract can elevate the flavor profile.
By mixing and matching these ingredients, you can easily create a tailor-made cereal bars recipe that suits your mood and cravings. Plus, you can feel great knowing you’re enjoying a snack that’s both delicious and nutritious!
Cooking Tips and Notes for Cereal Bars Recipe
Creating your own cereal bars recipe at home is a wonderful way to enjoy healthy snacks without all the added preservatives. Here are some tips to ensure your cereal bars turn out perfectly every time.
Best techniques for mixing
To achieve a well-combined mixture, I recommend using a large mixing bowl. Start by blending your dry ingredients together first – this helps distribute flavors evenly. Add any sticky ingredients, like honey or nut butter, gradually. Mixing with your hands can help you get that perfect texture, allowing all the ingredients to meld together.
How to prevent bars from sticking
If you’ve ever struggled with cereal bars sticking to the pan, you’re not alone. To avoid this mishap, line your baking dish with parchment paper and leave some overhang. This way, you can easily lift out the entire batch once cooled. Alternatively, a light spraying of cooking oil on the pan can help as well.
Storage tips for freshness
To keep your cereal bars fresh longer, store them in an airtight container at room temperature. For optimal freshness, wrap individual bars in plastic wrap or store them layered with parchment paper to prevent sticking. They can last for up to a week, or you can freeze them for up to three months for a quick grab-and-go snack!
Serving Suggestions for Cereal Bars Recipe
When considering how to enjoy your cereal bars recipe, it’s easy to see just how versatile these delicious treats can be. Whether you’re rushing out the door or enjoying a moment of downtime, these bars have you covered.
Perfect for breakfast or a snack
Start your day right by pairing a cereal bar with a fresh fruit smoothie or a cup of yogurt. The crunch of the bar complements the creaminess of yogurt wonderfully and makes for a balanced breakfast. Alternatively, if you’re in need of a pick-me-up during your busy day, these bars serve as an energizing snack. The wholesome ingredients offer quick energy without the sugar crash.
Great options for kids’ lunchboxes
Cereal bars are a favorite for kids and make a fantastic addition to any lunchbox. Slice them into smaller pieces or pack them whole; either way, they’ll satisfy hungry little tummies. Consider pairing them with some cheese slices or a small veggie pack for a well-rounded meal that kids will actually want to eat!
Time Breakdown for Cereal Bars Recipe
Crafting the perfect cereal bars recipe is not only fun; it’s also quick and easy! Understanding the time commitment can help you plan your day better.
Preparation time
Getting everything ready for your delicious cereal bars takes about 15 minutes. This includes measuring out ingredients and mixing them together.
Chilling time
After preparing, you’ll want to chill your bars for at least 30 minutes to allow them to set properly, ensuring a chewy texture that’s simply irresistible.
Total time
In total, you’ll spend approximately 45 minutes from start to finish. This includes both preparation and chilling time, perfect for a busy day when you need snacks on hand!
Nutritional Facts for Cereal Bars Recipe
Understanding the nutritional facts behind your homemade cereal bars can help you make informed choices while enjoying this delightful snack. Packed with goodness, these bars are more than just delicious!
Calories per bar
Each cereal bar contains approximately 150 calories, making them a great option for a quick energy boost without excessive calorie intake. Perfect for busy days or as a post-workout snack!
Protein content
With about 4 grams of protein per bar, these treats provide a decent protein source. This helps keep you feeling satisfied longer, making it an ideal addition to your on-the-go routine.
Sugar and fiber information
These cereal bars are low in refined sugars, containing roughly 6 grams. Additionally, they offer around 2 grams of fiber, aiding digestion and providing a sense of fullness. With these nutritional benefits, your cereal bars can become a wholesome part of your daily snacking!
FAQ about Cereal Bars Recipe
When diving into the delightful world of a cereal bars recipe, questions often arise, especially for those wanting to ensure their homemade goodies come out perfectly. Here’s a handy FAQ section to guide you through the process and answer those burning questions!
How do I ensure my bars hold together?
To create sturdy cereal bars that won’t crumble, the key is in the binding agents. Using a combination of nut butter (like almond or peanut butter) and a sweetener such as honey or maple syrup is essential. Try warming these ingredients slightly to make them easier to mix. Once combined, be sure to press the mixture firmly into your pan—this helps everything compact together. Lastly, allowing the bars to cool completely before cutting can greatly improve their ability to hold shape.
Can I make these cereal bars gluten-free?
Absolutely! A cereal bars recipe can be easily adapted to be gluten-friendly by substituting any traditional cereals with gluten-free options. Look for rice puffs, gluten-free oats, or any other certified gluten-free cereals. Always check the labels to ensure that your ingredients do not contain gluten, making your bars safe for anyone with dietary restrictions.
How long do these bars last?
When stored properly, your homemade cereal bars can last about a week at room temperature in an airtight container. If you want them to stay fresh longer, consider refrigerating them, where they can remain good for up to two weeks. For even longer storage, you might freeze them; just make sure to wrap each bar individually to prevent freezer burn. Enjoy your healthy, easy snack anytime!
Conclusion on Cereal Bars Recipe – Healthy & Easy!
Final thoughts on snacking smarter
Incorporating a cereal bars recipe into your snack rotation is a game changer for busy professionals. These bars are not only healthy but also incredibly easy to make, perfect for those on the go. Make them ahead of time and enjoy a quick pick-me-up during your hectic days. Think about how satisfying it feels to grab a delicious homemade treat, knowing exactly what went into it. By opting for these nutritious bars, you’re taking a step toward smarter snacking, ensuring you have the energy to tackle your tasks with confidence!
Print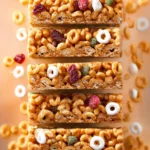
No-Bake Cereal Bars
- Total Time: 1 hour 15 minutes
- Yield: 16 bars 1x
- Diet: Vegetarian
Description
A quick and easy recipe for delicious no-bake cereal bars that make a perfect snack!
Ingredients
Scale
- 1/3 cup peanut butter
- 1/3 cup pure maple syrup
- 3 cups cereal of choice (I used Cheerios)
- 2–3 tablespoons toppings (try chocolate chips, freeze-dried fruit, etc.)
Instructions
- Line an 8-inch square baking pan with parchment paper or wax paper. Clear some space in the freezer for this pan—you’ll need it later. Set pan aside at room temperature.
- Whisk nut butter and maple syrup together in a microwave-safe bowl. Heat in 20-second increments until warm and fragrant. Whisk in between heating increments.
- Add cereal of choice to the sticky nut butter mixture. Stir and fold until well mixed.
- Pour cereal bar mixture into lined pan. Press firmly into a tightly-packed, even layer. If using, press optional toppings into the tops of bars.
- Chill cereal bars in the freezer for 1 hour. Remove from freezer and slice into 16 bars. Enjoy immediately or store in the refrigerator or freezer—the bars will set over the first day.
Notes
- ★ Last Step: If you made this recipe, leave a comment and review. It truly helps our small business keep running and it helps readers like you!
- Prep Time: 15 minutes
- Cook Time: 0 minutes
- Category: Snacks
- Method: No-Bake
- Cuisine: American
Nutrition
- Serving Size: 1 bar
- Calories: 150
- Sugar: 5g
- Sodium: 50mg
- Fat: 6g
- Saturated Fat: 1g
- Unsaturated Fat: 4g
- Trans Fat: 0g
- Carbohydrates: 20g
- Fiber: 2g
- Protein: 4g
- Cholesterol: 0mg